Environment considerations when using iBeacons on iOS
In a previous post I explored how beacons (iBeacons and any other flavour too) could be used for indoor location with certain precautions and limitations. Now I’ll explore a simpler scenario: detecting proximity from device to beacon, which is basically the purpose of beacons.
For this post I used Gelo iBeacons, which adhere to the iBeacon standard and CoreLocation framework to perform the readings.
The App
The app developed is on GitHub and can be used for your own experimentation too, since it provides mapping, recording, replay of sessions and charting. It’s also pretty configurable in terms of beacons positioning, room dimensions and drawing methods.
The app uses CoreLocation and as such it does some cleaning of signal readings for noise filtering. The effects of this filtering will be reflected later during the post.
Also note that if possible, you should calibrate your beacons prior to using them.
Detecting iBeacons
Apple suggests to use CLProximity, offering an enumeration of possible situations: Unknown|Immediate|Near|Far. There’s no specification of what distance each value triggers, but empirically it’s something around 0.3m (1 feet and 3.75 inches) or less for Immediate, 3m (9 feet and 10.11 inches) or less for Near and above 3m for Far.
Then there’s CLLocationAccuracy values, which are an approximate of the distance to the beacon in meters, but Apple indicates the following when using it:
Indicates the one sigma horizontal accuracy in meters. Use this property to differentiate between beacons with the same proximity value. Do not use it to identify a precise location for the beacon. Accuracy values may fluctuate due to RF interference.
So it all depends on your context: Are you using beacons to alert clients when they enter a section of your shop? If distance between sections is far enough then CLProximity is what you need. Are you using beacons to alert clients when they sit on a table on your restaurant? This may need an adhoc analysis of both CLProximity and CLLocationAccuracy in order to correctly detect the nearest beacon, since tables are probably quite near each other and interference may come into play.
Environment testing
In order to get an idea of how an indoor environment is affecting the readings, I decided to practice a series of experiments that reflect common scenarios and can serve as heuristics/hints when developing a particular iBeacon solution.
The following charts present different behavioural patterns of the signal, but it’s not meant to be an exhaustive statistical analysis. Basically, I’ll show how distance, material obstructions and moving around with your phone affect your beacons measures. In case the reader wants to do a more complete statistical analysis, the logs of the distance experiments can be found at the Logs directory.
Distance
I stood static at different distances from the beacon and recorded several sessions for each one, here’s the most representative ones:
-
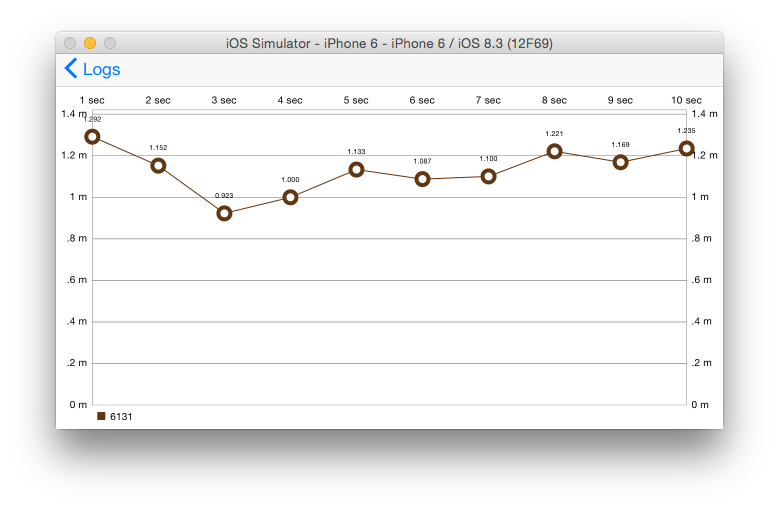
Device at 1m (3 feet and 3.37 inches) from beacon (statistic range: 0.4m):
-
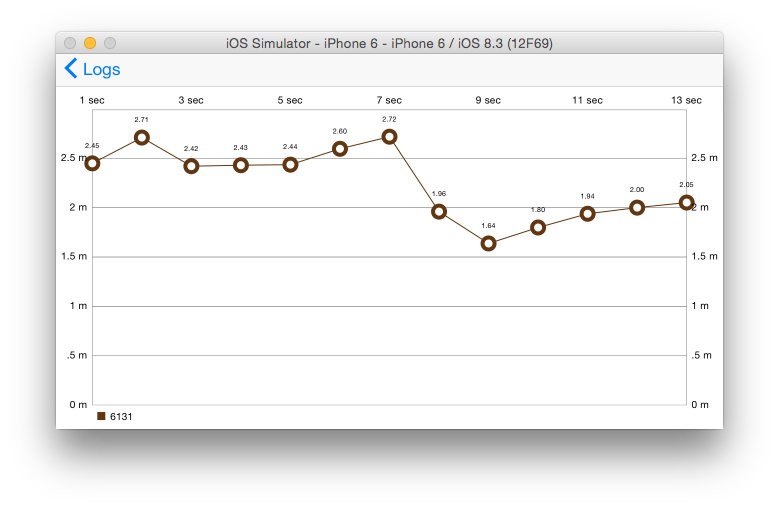
Device at 2m from beacon (statistic range: 1.1m):
-
Device at 3m from beacon (statistic range: 2.2m):
-
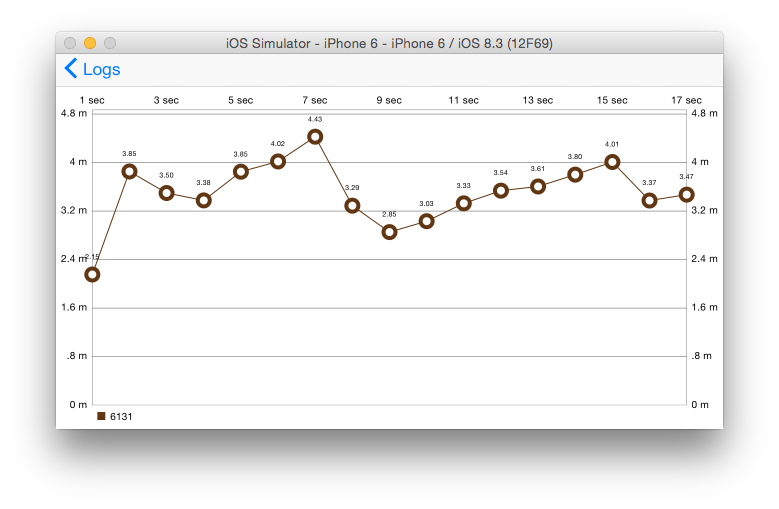
Device at 4m from beacon (statistic range: 3m):
-
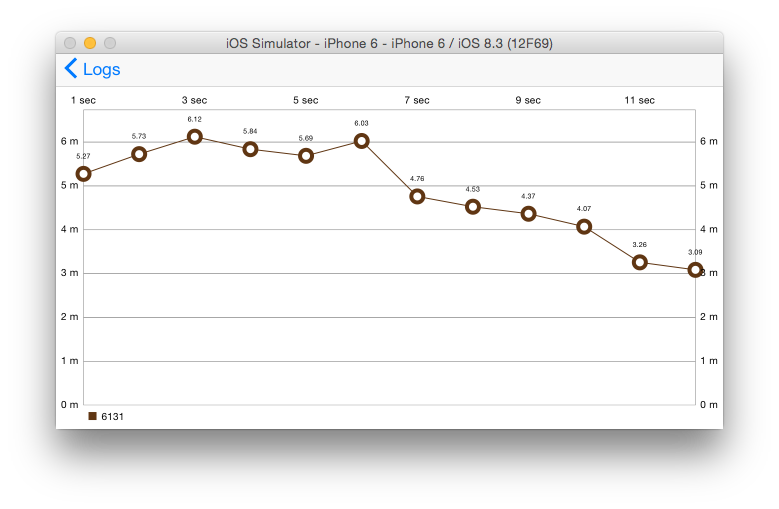
Device at 5m from beacon (statistic range: 5m):
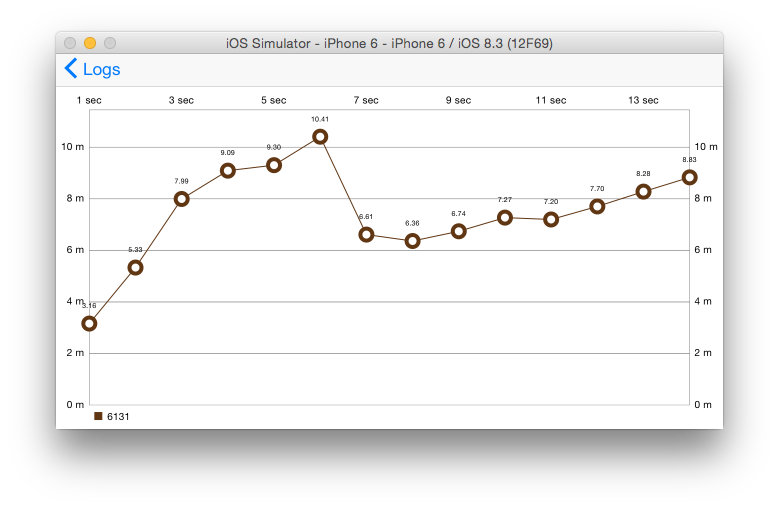
Observation: when you move away from the beacon, your readings lose precision and the range of possible values increases. The nearer you’re to the beacon, the more you can trust on the measured signal.
Obstructions
Your room will have some furniture, walls, RF devices and maybe people moving around. These factors certainly affect signal attenuation and interference, making your app switch from Near to Far or even Unknown in a wink of an eye. Take a look at the following examples:
-
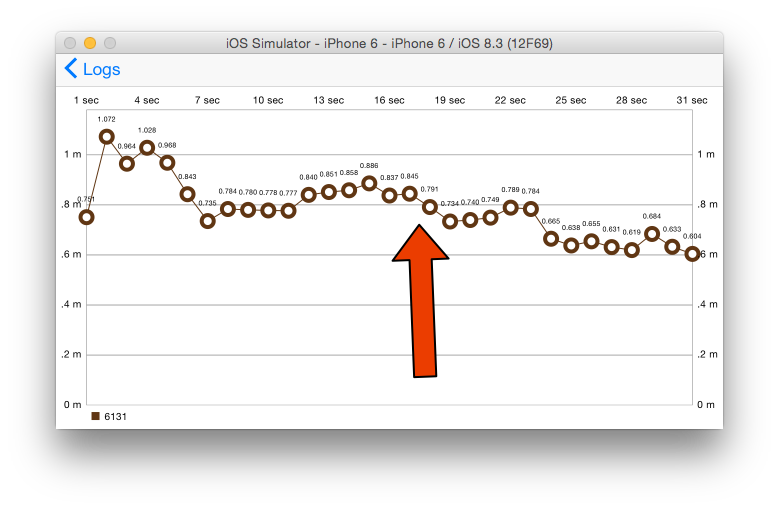
Device at 1m from beacon and a wood table in between (interposed when arrow points):
-
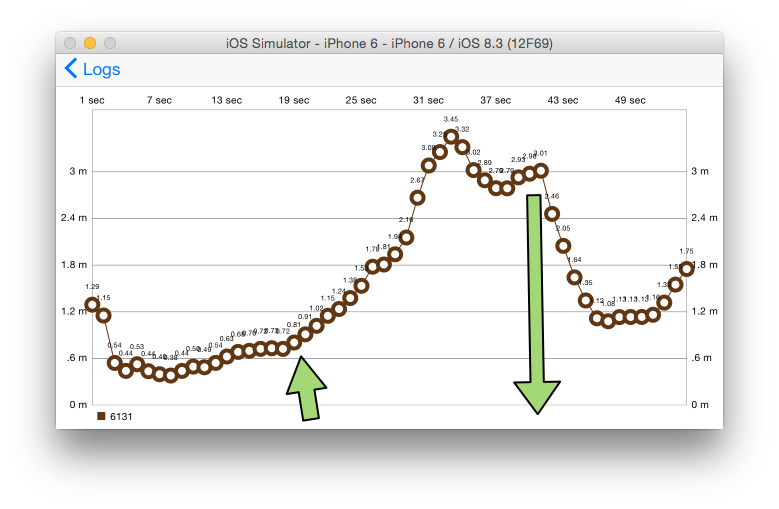
Device at 1m from beacon and a concrete wall in between (interposed and removed when arrows points):
-
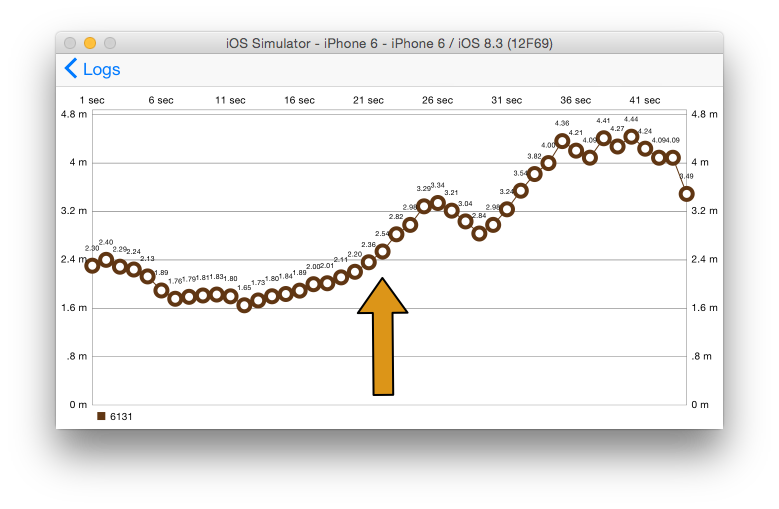
Device at 2m from beacon and a human body in between (interposed when arrow points):
Observation: readings can easily turn into 100% error due to signal attenuation with some materials but not with others. Search for how 2.4 ghz signals attenuate with the materials in your environment and adapt your solution and place properly.
One important factor for beacons is transmission power, obstructions can make your beacons go undetected at certain distance if they do not transmit with enough power or you may be using too much power (high battery drain) when you may only need to have beacons discovered at a very small distance. A good guide about Tx Power is provided by Kontakt.
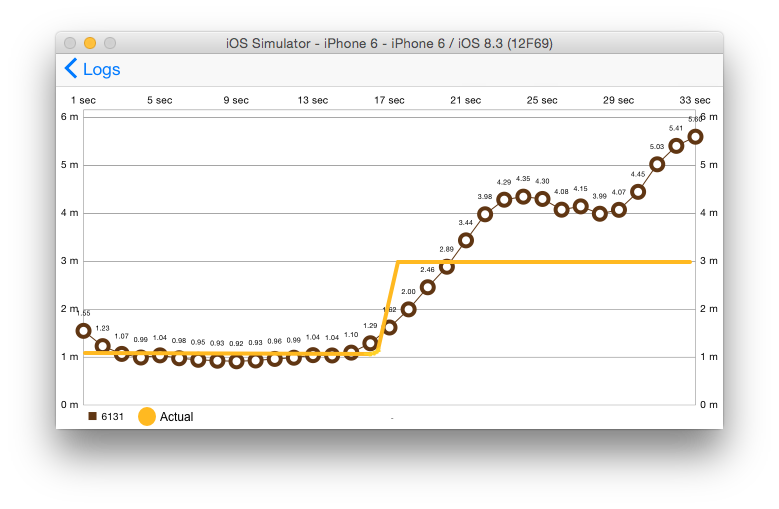
Moving
Take a look at how moving around with your phone may confuse and delay actual positions.
-
Device at 1m from beacon and quickly moved to 3m:
-
Same as above but with advertising interval of 100ms:
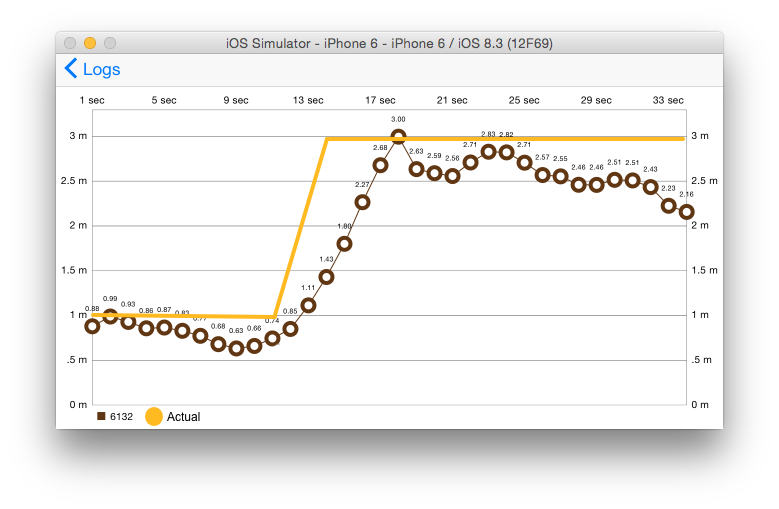
Observation: readings have a delay until they reflect the proper value, mainly because of the noise filtering algorithm CoreLocation is using. So you always depends on this window of time to detect the correct proximity.
There is another aspect that can reduce delay and improve accuracy (see second chart above): It’s the interval at which the beacon emits the advertising signal. Apple makes it explicit to use 100ms (10 times a second), but this is pretty battery hungry and many iBeacons manufacturers has a default value of 300ms or 400ms, which is ok for most cases.
Conclusion
Deploying iBeacons is easy but having a good proven solution to a particular environment requires experimentation and tuning.
Try to simulate extreme situations in your indoor environment (lots of people around, many RF devices nearby, etc) and see if you still get the beacons detected the way you plan it to be.
My suggestion is to use both CLProximity and CLLocationAccuracy as well as playing with Tx Power and advertising interval for curating a specific user experience.